如何开发新适配器
EcuBus-Pro 目前支持多种主流 CAN 通信盒,但您可能拥有来自不同制造商、具有不同型号和接口的其他 CAN 盒。 按照官方网站的开发流程如何开发新适配器,您可以为 EcuBus-Pro 添加底层驱动程序进行适配。
为此,我在现有基础上添加了一些 Vector 驱动程序。 由于这是我第一次使用这些技术,以下步骤仅供参考。
1. 必备基础知识
- 根据手册步骤,以 ZLG CAN 盒为例,CAN 盒驱动程序与 Electron 客户端的交互原理大致如下:CAN 盒 lib 库 + .h 头文件 + .i 接口文件使用 SWIG 生成 zlg_wrap.cxx,.cxx 文件通过 node-gyp 编译成 zlg.node,导入 .node 后,在 index.ts 中实现设备初始化、CAN 发送/接收等功能,最后用于 Electron 的 base.ts 接口实现和 zlg.test.ts 测试。
SWIG 的作用是将驱动程序 API C/C++ 语言转换为 Javascript,使其他语言能够访问这些 API 声明并调用 Lib 接口。
Node-gyp 将已转换为 Javascript 的 C/C++ API 和 Lib 构建成 node 模块,以便跨平台分发。
各文件的作用:
zlg.i:SWIG 接口文件,定义 C/C++ 如何转换为 Javascript 标准
s.bat:将 C/C++ 代码转换为 Javascript 代码的脚本,用于生成 zlg_wrap.cxx
zlg_wrap.cxx:生成的 Javascript 代码
buffer.i、buffer1.i:缓冲区接口,通常不变
tsfn.cxx:线程安全文件,CAN 发送/接收线程的入口点
zlg.node:编译后的 node 模块,可在 .ts 文件中使用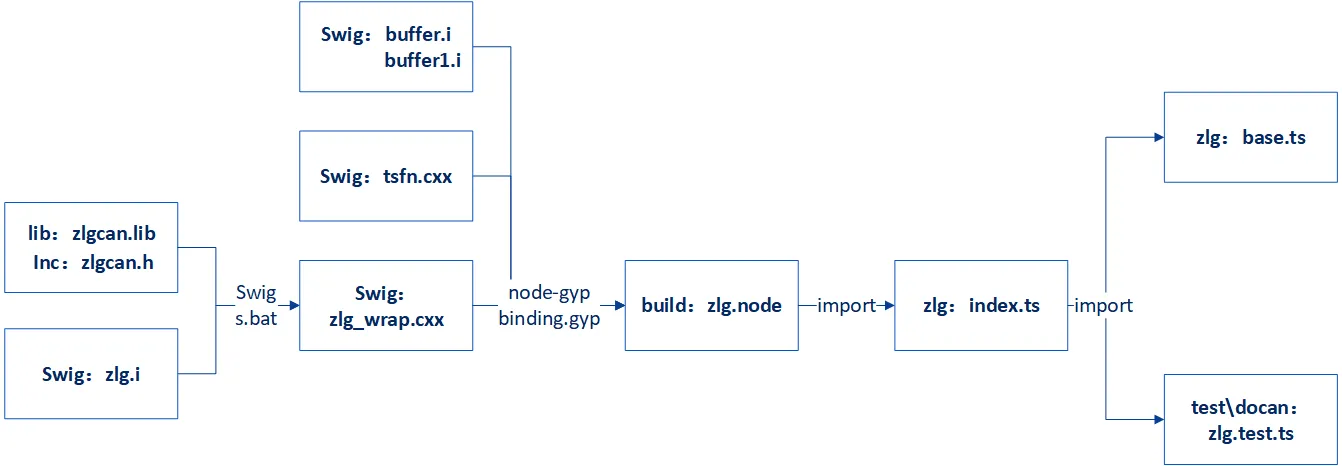 2. 按照此流程需要掌握基本的 JavaScript/Typescript 语法知识。 对于仅了解 C/C++ 的用户,快速学习 Typescript 的方法是通过菜鸟教程网站上的 TypeScript 教程。 花费 1-2 天时间跟随教程中的每个示例,将帮助您掌握基本语法和语言特性。 对于更高级的应用和实现方法,可以在编写实际相关代码时查阅资料。 3. 对于 SWIG,我们只需要知道它是一个跨语言编译器,可以为驱动程序 API C/C++ 声明创建包装器,使 Typescript 和其他语言能够访问这些声明。 SWIG 非常强大且复杂,但我们可以暂时忽略其他功能,仅通过一个简单示例了解 SWIG 的工作原理,例如参考这篇 SWIG 介绍与入门指南
2. 替换与构建
有了以上基础知识,基于现有驱动程序添加新的 CAN 盒驱动程序就变得简单多了。 最佳方法是模仿并逐步替换现有程序。 如果您已有用其他语言实现的已开发的新 CAN 盒驱动程序,只需将设备初始化、CAN 发送/接收等功能转换为 Typescript 语言。 转换工作可以由 AI 完成。
如果您之前没有实现过 CAN 盒驱动程序,可以参考 CAN 盒制造商提供的官方示例,这些示例也有用各种语言实现的 API 流程,同样将它们转换为 Typescript。
按照 zlg 实现 vector 驱动程序的过程如下:
复制 .\docan\zlg 目录下的文件夹并创建 vector 文件夹
text<\zlg> ├index.ts ├<\inc> │ ├canframe.h │ ├config.h │ ├typedef.h │ └zlgcan.h ├<\lib> │ └zlgcan.lib ├<\swig> │ ├buffer.i │ ├buffer1.i │ ├s.bat │ ├tsfn.cxx │ ├zlg.i │ └zlg_wrap.cxx <\vector> ├index.ts ├<\inc> │ └vxlapi.h ├<\lib> │ └vxlapi64.lib ├<\swig> │ ├buffer.i │ ├buffer1.i │ ├s.bat │ ├tsfn.cxx │ ├vector.i │ └vector_wrap.cxx将 .h 文件和 .lib 替换为 vector 文件,其他文件暂时保持不变,并将所有文件重命名为 vector。
修改 SWIG 接口文件 vector.i,将模块名称和包含的头文件替换为 vector 的,暂时禁用所有各种 pointer_class、array_class 等,因为这些定义和映射来自 .h 文件,新的 vxlapi.h 可能不包含它们。 如果需要,稍后添加它们,确保 .i 不包含原始 zlgcan.h 内容。
保持其他线程安全函数如 CreateTSFN 不变。plain%module vector ... %header %{ ... #include "vxlapi.h" ... // %array_class(uint32_t, U32Array); // %array_class(BYTE, ByteArray); // %array_class(ZCAN_Receive_Data, ReceiveDataArray); // %array_class(ZCAN_ReceiveFD_Data, ReceiveFDDataArray); ... %}将 vector 的 s.bat 改为:
batswig -I"./../inc" -c++ -javascript -napi -v ./vector.i在 .\docan\vector\swig 目录下的 cmd 中执行上述命令,这将从 inc 目录中的 vxlapi.h 头文件生成 vector_wrap.cxx。
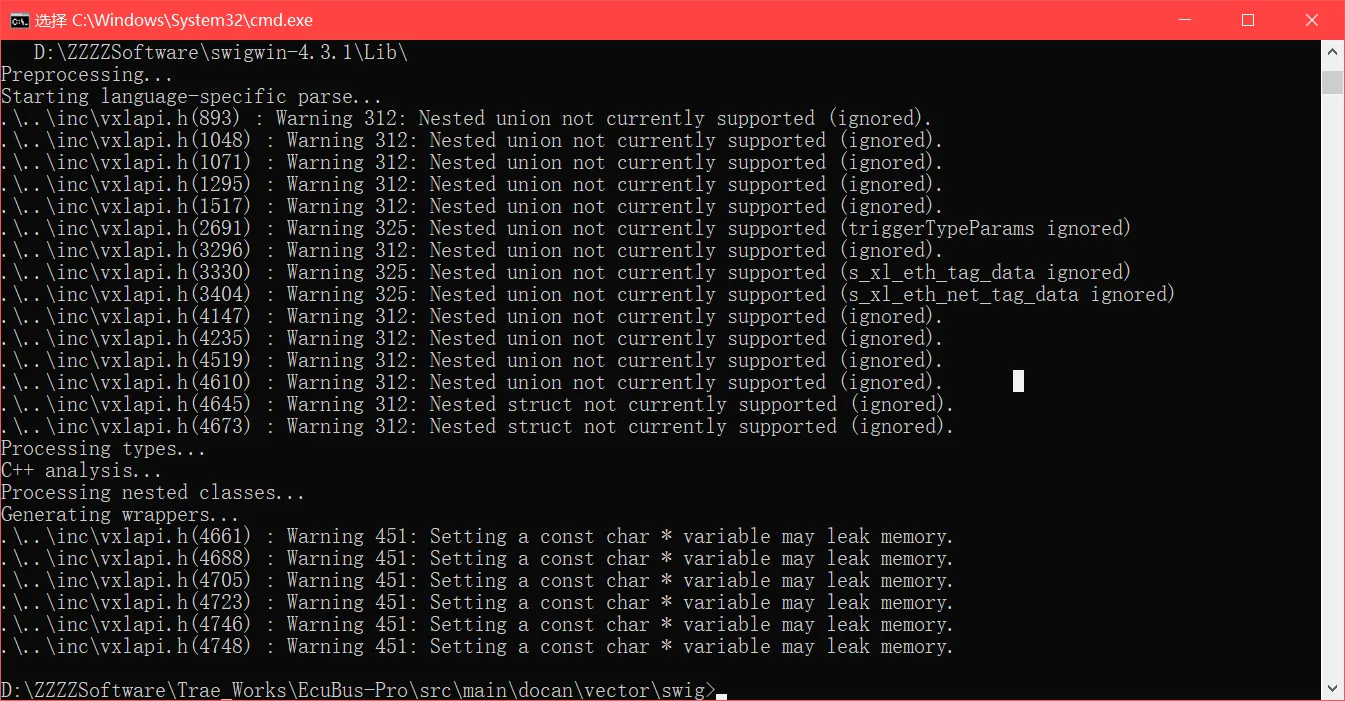
如果 cmd 报错,表示 vxlapi.h 中的某些代码无法转换为 .cxx,需要根据提示禁用或修改,直到成功生成 .cxx。 此时,ts 文件实际上可以使用 vector_wrap.cxx 访问 Lib API,但为了跨平台兼容性,需要进一步生成 .node 模块。修改安全线程 tsfn.cxx 文件,替换 include zlgcan.h,该文件也有关于 ZLG API 的实现函数,暂时禁用它们,稍后替换,确保 .cxx 不包含原始 zlgcan.h 内容。
plain#include "vxlapi.h" ... // numCan=ZCAN_GetReceiveNum(context->channel,TYPE_CAN); // numCanFd=ZCAN_GetReceiveNum(context->channel,TYPE_CANFD); // ZCAN_CHANNEL_ERR_INFO err; // ZCAN_ReadChannelErrInfo(context->channel,&err); // ZCAN_ResetCAN(context->channel); ...在此步骤中,swig 目录中的程序不再包含原始 ZLG 代码内容,因此可以构建 vector.node。 修改 .\docan\binding.gyp,在 'target_name': 'zlg' 之后添加 'target_name': 'vector' 内容,并禁用其他设备的构建指令,这样 npx node-gyp rebuild 就不会每次都重复构建 peak、kvaser 和其他驱动程序。
'target_name': 'vector' 需要为 vxlapi64.lib 和 vector_wrap.cxx、tsfn.cxx 指定正确的路径。
# 'target_name': 'peak',
# 'target_name': 'kvaser',
# 'target_name': 'zlg',
# 'target_name': 'toomoss',
{
   'target_name': 'vector',
   'conditions': [
      ['OS=="win"', {
         'include_dirs': [
             './vector/inc',
             "<!@(node -p \"require('node-addon-api').include\")"
         ],
         'configurations': { },
         'defines': [
             '__EXCEPTIONS'
         ],
         'sources': [
             './vector/swig/vector_wrap.cxx',
             './vector/swig/tsfn.cxx'
         ],
         'cflags': [ ],
         'cflags_cc': [ ],
         'libraries': ['<(module_root_dir)/vector/lib/vxlapi64.lib'],
         'defines': [ 'DELAYLOAD_HOOK' ],
         'msvs_settings': {
             'VCCLCompilerTool': {
                 'AdditionalOptions': [ '/DELAYLOAD:vxlapi64.dll' ],
                 'ExceptionHandling':1
             }
         },
         'link_settings': {
             'libraries': [ '-DELAYLOAD:vxlapi64.dll' ]
         }
      },
      ...
      ]
}
在终端中执行 npx node-gyp rebuild,这将在 \docan\build\Release 下生成 vector.node。 此时,C/C++ 和 Lib 已被编译并构建成可供 ts 文件使用的 Node 模块。 如果构建失败,请根据错误提示进行修改。
cd src/main/docan
npx node-gyp rebuild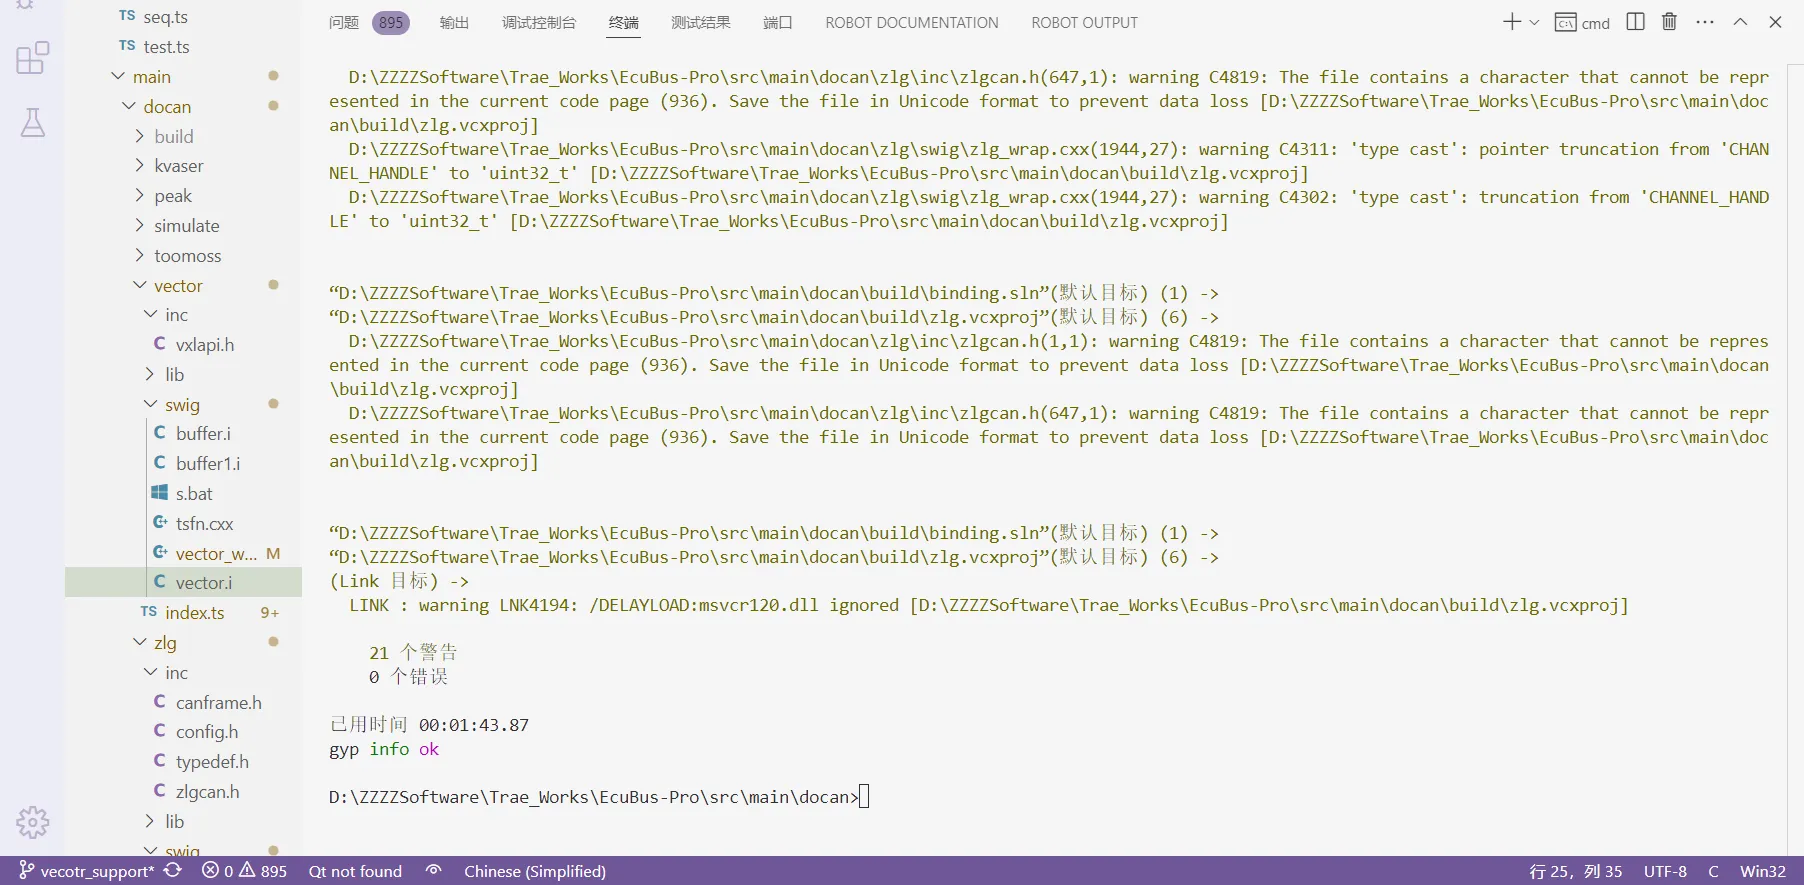
3. 移植与测试
CAN 设备初始化和发送/接收功能均在 index.ts 文件中实现。 将原来的 import ZLG 改为 import VECTOR,将所有 ZLG 实现方法改为 VECTOR 实现方法。 暂时只需简单替换,VECTOR 中不存在的所有方法可以暂时禁用。 导入之前生成的 vector.node 后,即可使用所有 vector API。
plainimport VECTOR from './../build/Release/vector.node' ... export class VECTOR_CAN extends CanBase ... const devices = VECTOR_CAN.getValidDevices() ...index.ts 中的构造函数方法继承自 CanBaseInfo,其中包含 Electron UI 中设备选择的信息,通过重写 getValidDevices 方法,可用设备列表也会添加到 UI 下拉列表中。
ts//新构造函数方法 constructor(info: CanBaseInfo) { super() this.id = info.id //当前子类使用父类中的 = 属性 this.info = info const devices = VECTOR_CAN.getValidDevices() //获取设备列表的方法 const target = devices.find((item) => item.handle == info.handle) //在设备列表中获取句柄 == 下拉菜单中选定的句柄 if (!target) { throw new Error('无效句柄') //无效句柄,无效设备 } this.event = new EventEmitter() //创建 EventEmitter 对象,然后使用其方法发出和监听事件 this.log = new CanLOG('VECTOR', info.name, this.event) // //'0:0' = 哪个总线:通道索引 this.index = parseInt(info.handle.split(':')[1]) //通道索引::0 this.deviceType = parseInt(info.handle.split('_')[0]) //父类中的设备类型:XL_HWTYPE_VN1611 this.deviceIndex = parseInt(info.handle.split('_')[2]) //通道索引:_0在 index.ts 中添加设备初始化代码后,您可以直接调试 index.ts,但由于最终使用的参数是从 UI 选择传递的,确保 info 参数的正确传递也至关重要。
按照 zlg.test.ts 在 .\test\docan 下创建 vector.test.ts。 通过调试 .test.ts 文件来调试 index.ts 文件,您可以模拟 UI 中的不同参数设置。 只要 .test.ts 测试通过,Electron 的 UI 参数传递也将确保正确。
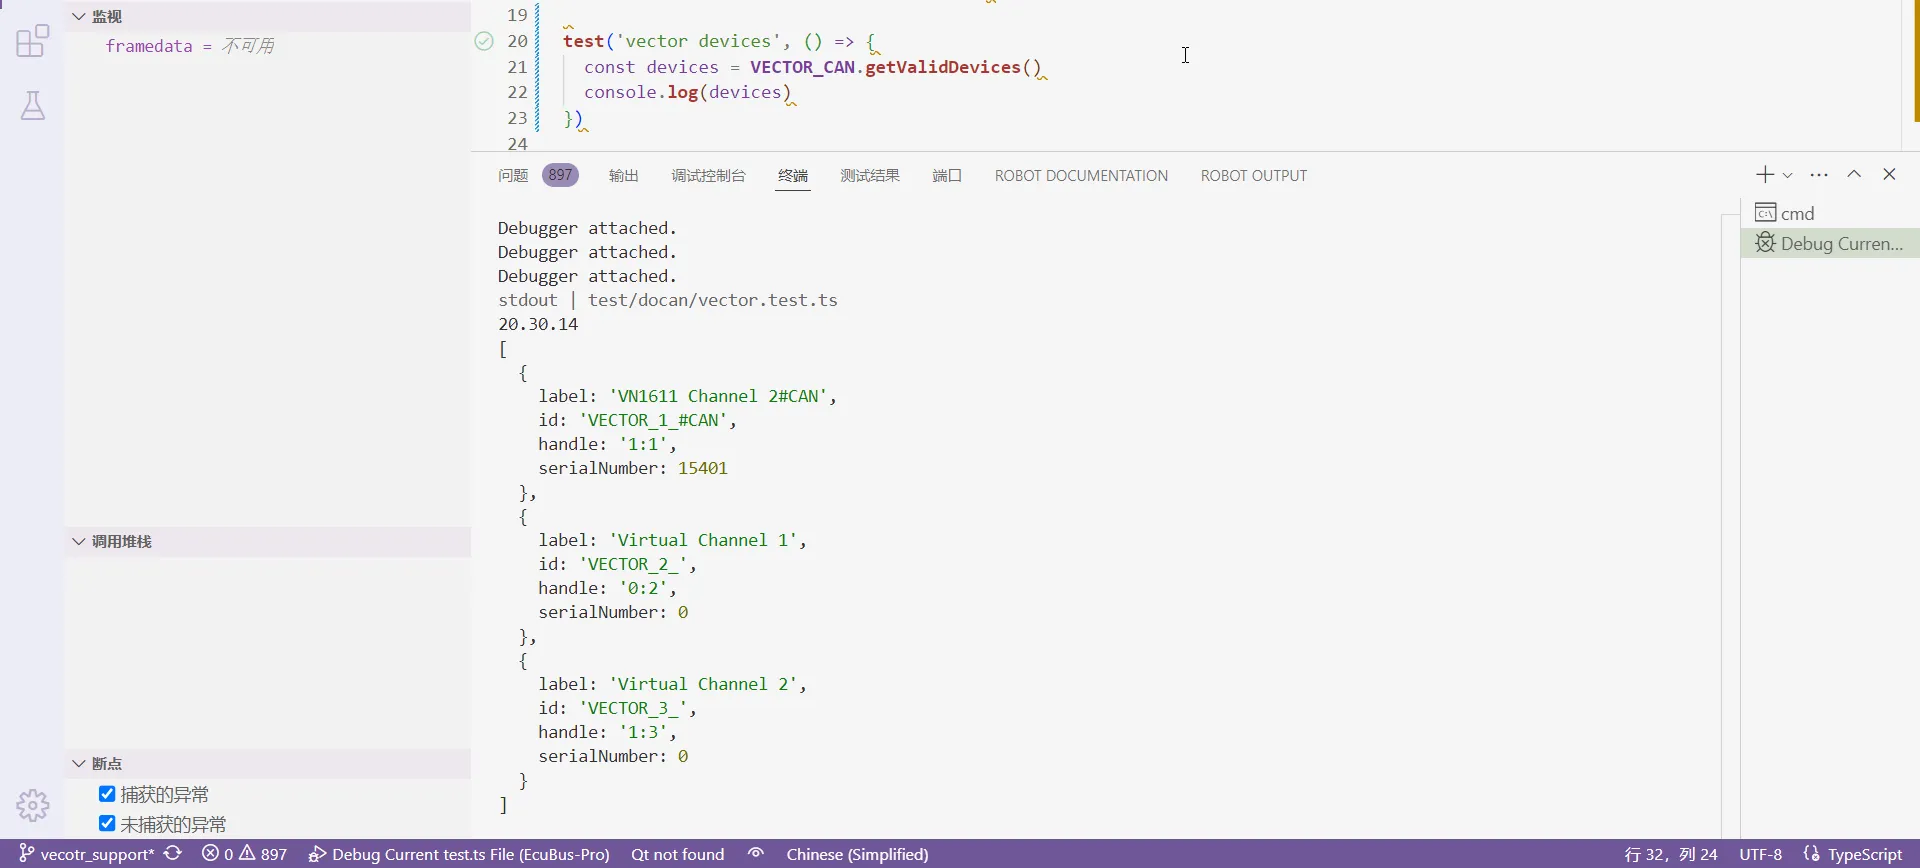
在 vscode 的 launch.json 中添加以下配置以调试 .test.ts:json{ "type": "node", "request": "launch", "name": "Debug Current test.ts File", "autoAttachChildProcesses": true, "skipFiles": ["<node_internals>/**", "**/node_modules/**"], "program": "${workspaceRoot}/node_modules/vitest/vitest.mjs", "args": ["run", "${relativeFile}"], "smartStep": true, "console": "integratedTerminal" },以下是如何调试 index.ts 的示例。 如果 Lib 有用于查询设备信息的 API,您可以先实现 getValidDevices 函数。 在 vector.test.ts 中创建一个新测试以实现 getValidDevices 方法,并暂时禁用其他关于 CAN 发送/接收的测试。
tsimport { VECTOR_CAN } from '../../src/main/docan/vector' ... const dllPath = path.join(__dirname, '../../resources/lib') VECTOR_CAN.loadDllPath(dllPath) ... test('vector devices', () => { const devices = VECTOR_CAN.getValidDevices() console.log(devices) })转到 index.ts 实现此方法。 例如,vector 用于获取设备信息的 API 是 xlGetDriverConfig。 对于 API 参数所需的数据类型,您可以直接使用 vxlapi.h 中的那些。
tsstatic override getValidDevices(): CanDevice[] { //重写 getValidDevices 方法,返回值是 CanDevice,返回可用设备列表 const devices: CanDevice[] = [] if (process.platform === 'win32') { const deviceHandle = new VECTOR.XL_DRIVER_CONFIG() const ret = VECTOR.xlGetDriverConfig(deviceHandle) //获取/打印硬件配置 g_xlDrvConfig if (ret === 0) { ... devices.push({ label: `${channelName}${busType}`, //'VN1640A Channel 1#LIN' = 通道名称#总线类型 id: `VECTOR_${num}_${busType}`, //'VECTOR_0_#LIN' = 通道索引_#总线类型 handle: `${channel.hwChannel}:${num}`, //'0:0' = 哪个总线:通道索引 serialNumber: channel.serialNumber }) } } } return devices }如果 console.log(devices) 在终端中打印正确的设备信息,则说明 .ts 可以正确访问 .Lib API,并且所有之前的转换步骤都是正确的。
如果 .Lib 没有用于获取设备信息的 API,您可以使用其他 API 进行简单测试,以测试 .Lib 是否被 .ts 正确使用。 如果在调试期间无法访问 API 或 API 出错,您需要返回之前的步骤,并检查生成 .cxx 和 .node 时是否有错误。 对于 getValidDevices,您可以按照 .\zlg\index.ts 并根据设备特性返回固定标识符和句柄。
tsstatic override getValidDevices(): CanDevice[] { if (process.platform == 'win32') { const zcanArray: CanDevice[] = [ { label: 'ZCAN_USBCANFD_200U_INDEX_0_CHANNEL_0', id: 'ZCAN_USBCANFD_200U_INDEX_0_CHANNEL_0', handle: `${ZLG.ZCAN_USBCANFD_200U}_0_0` },在 .ts 中可以正确使用 .Lib API 后,在 vector.test.ts 中为 vector 设备初始化创建一个测试。 此处设置的参数将随 info 一起传递给构造函数方法。
tsdescribe('vector test', () => { let client!: VECTOR_CAN beforeAll(() => { client = new VECTOR_CAN({ handle: '3:3', name: 'test', id: 'VECTOR_3_#CAN', vendor: 'vector', canfd: true, bitrate: { sjw: 1, timeSeg1: 13, timeSeg2: 2, preScaler: 10, freq: 500000, clock: '80' }, bitratefd: { sjw: 1, timeSeg1: 7, timeSeg2: 2, preScaler: 4, freq: 2000000, clock: '80' } }) })在 index.ts 中,传递的参数 info 索引将决定使用 getValidDevices 返回的哪个设备通道。 通道匹配后,将进一步执行其他初始化函数。
tsconstructor(info: CanBaseInfo) { const devices = VECTOR_CAN.getValidDevices() //获取设备列表的方法 this.index = parseInt(info.handle.split(':')[1]) //通道索引::0 const DrvConfig = new VECTOR.XL_DRIVER_CONFIG() let xlStatus = VECTOR.xlGetDriverConfig(DrvConfig) //获取/打印硬件配置 g_xlDrvConfig const channles = VECTOR.CHANNEL_CONFIG.frompointer(DrvConfig.channel) //通道配置 this.channelConfig = channles.getitem(this.index) //通道编号 // 通道掩码计算 this.channelMask = VECTOR.xlGetChannelMask( this.channelConfig.hwType, this.channelConfig.hwIndex, this.channelConfig.hwChannel ) .... xlStatus = VECTOR.xlOpenPort( this.PortHandle.cast(), 'EcuBus-Pro', this.channelMask, this.PermissionMask.cast(), 16384, 4, 1 )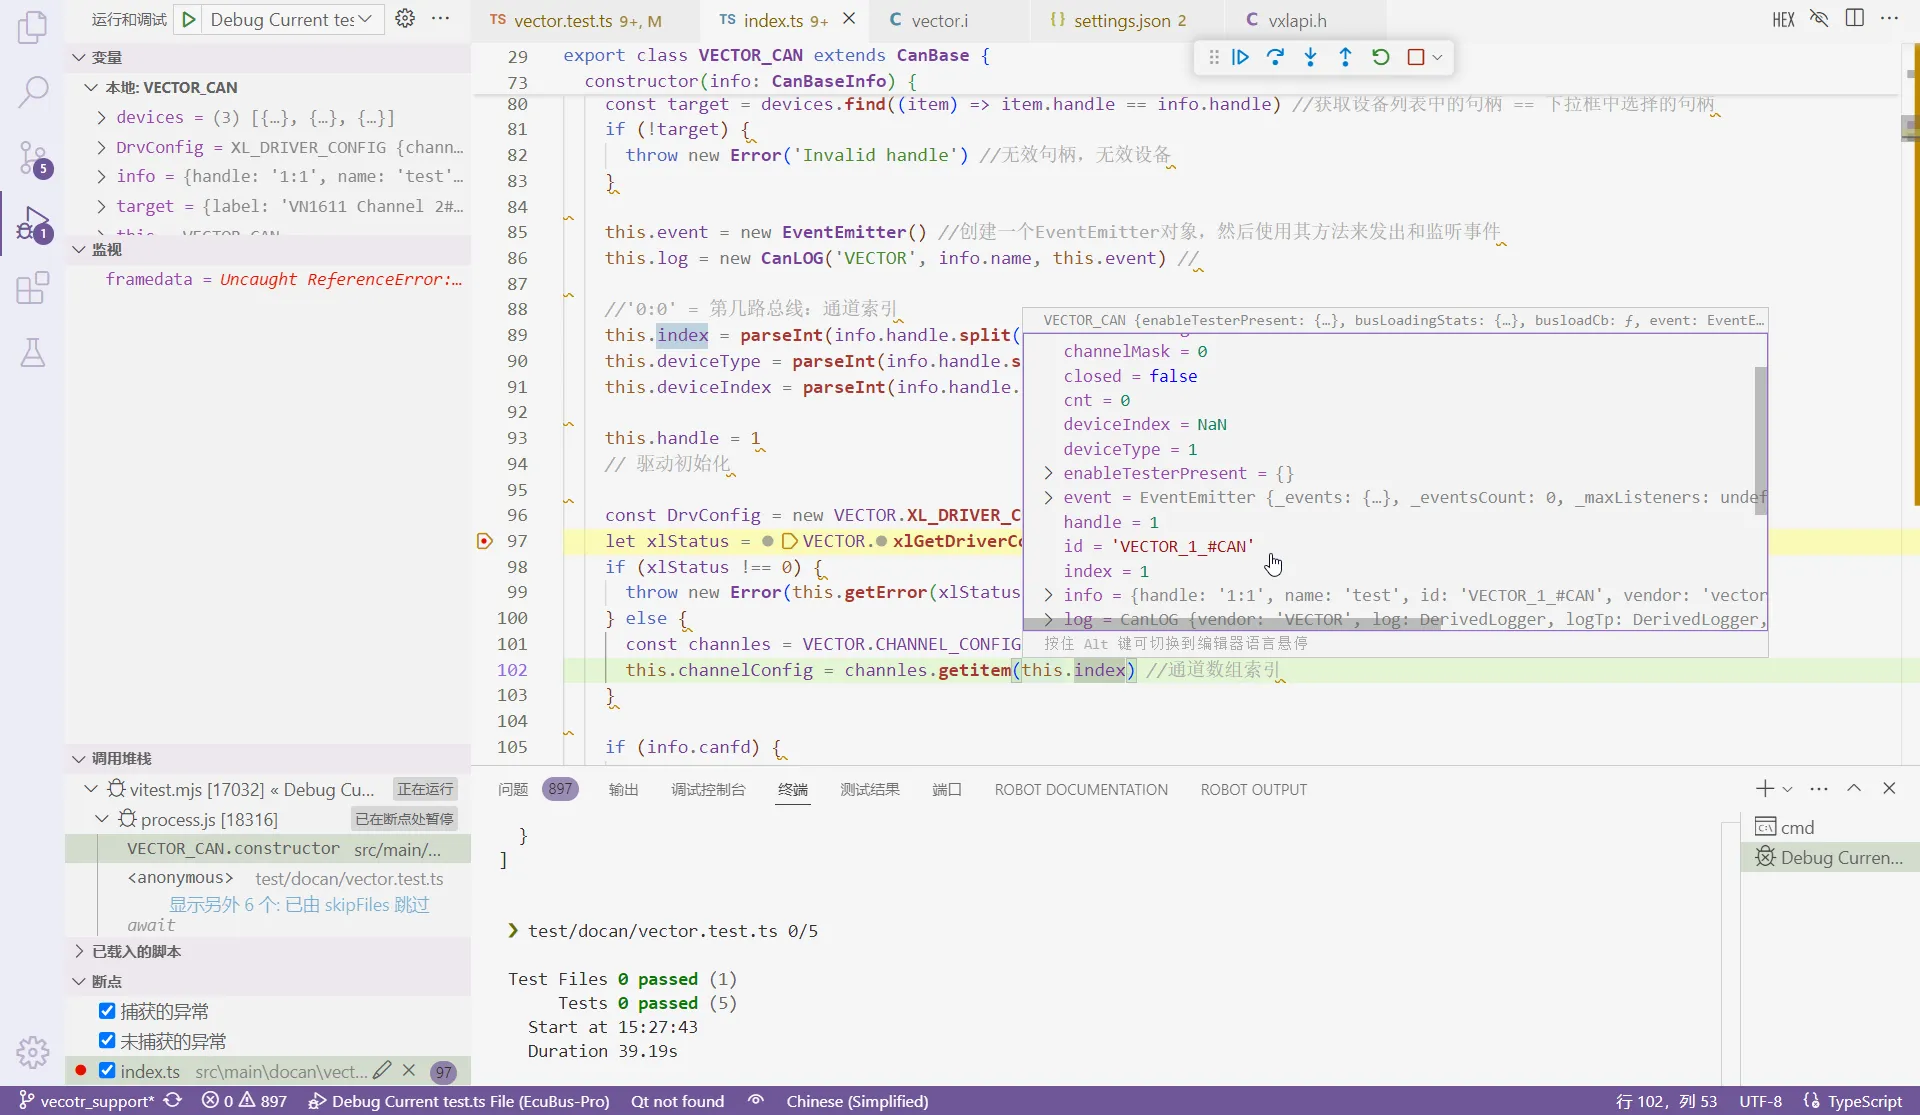
不同设备的初始化过程差异很大,此处不再赘述。 根据实际情况将它们添加到构造函数方法中。 对于 CAN 发送/接收函数,您可以先在构造函数中实现它们,确保发送/接收正常,然后将发送函数移植到 _writeBase,接收函数移植到 callback、callbackFd,并以相同方式实现其他方法如 close、getError 等。 同时在 vector.test.ts 中测试发送/接收。
tstest.skip('write multi frame', async () => { test('read frame', async () => { test('write frame can-fd', async () => {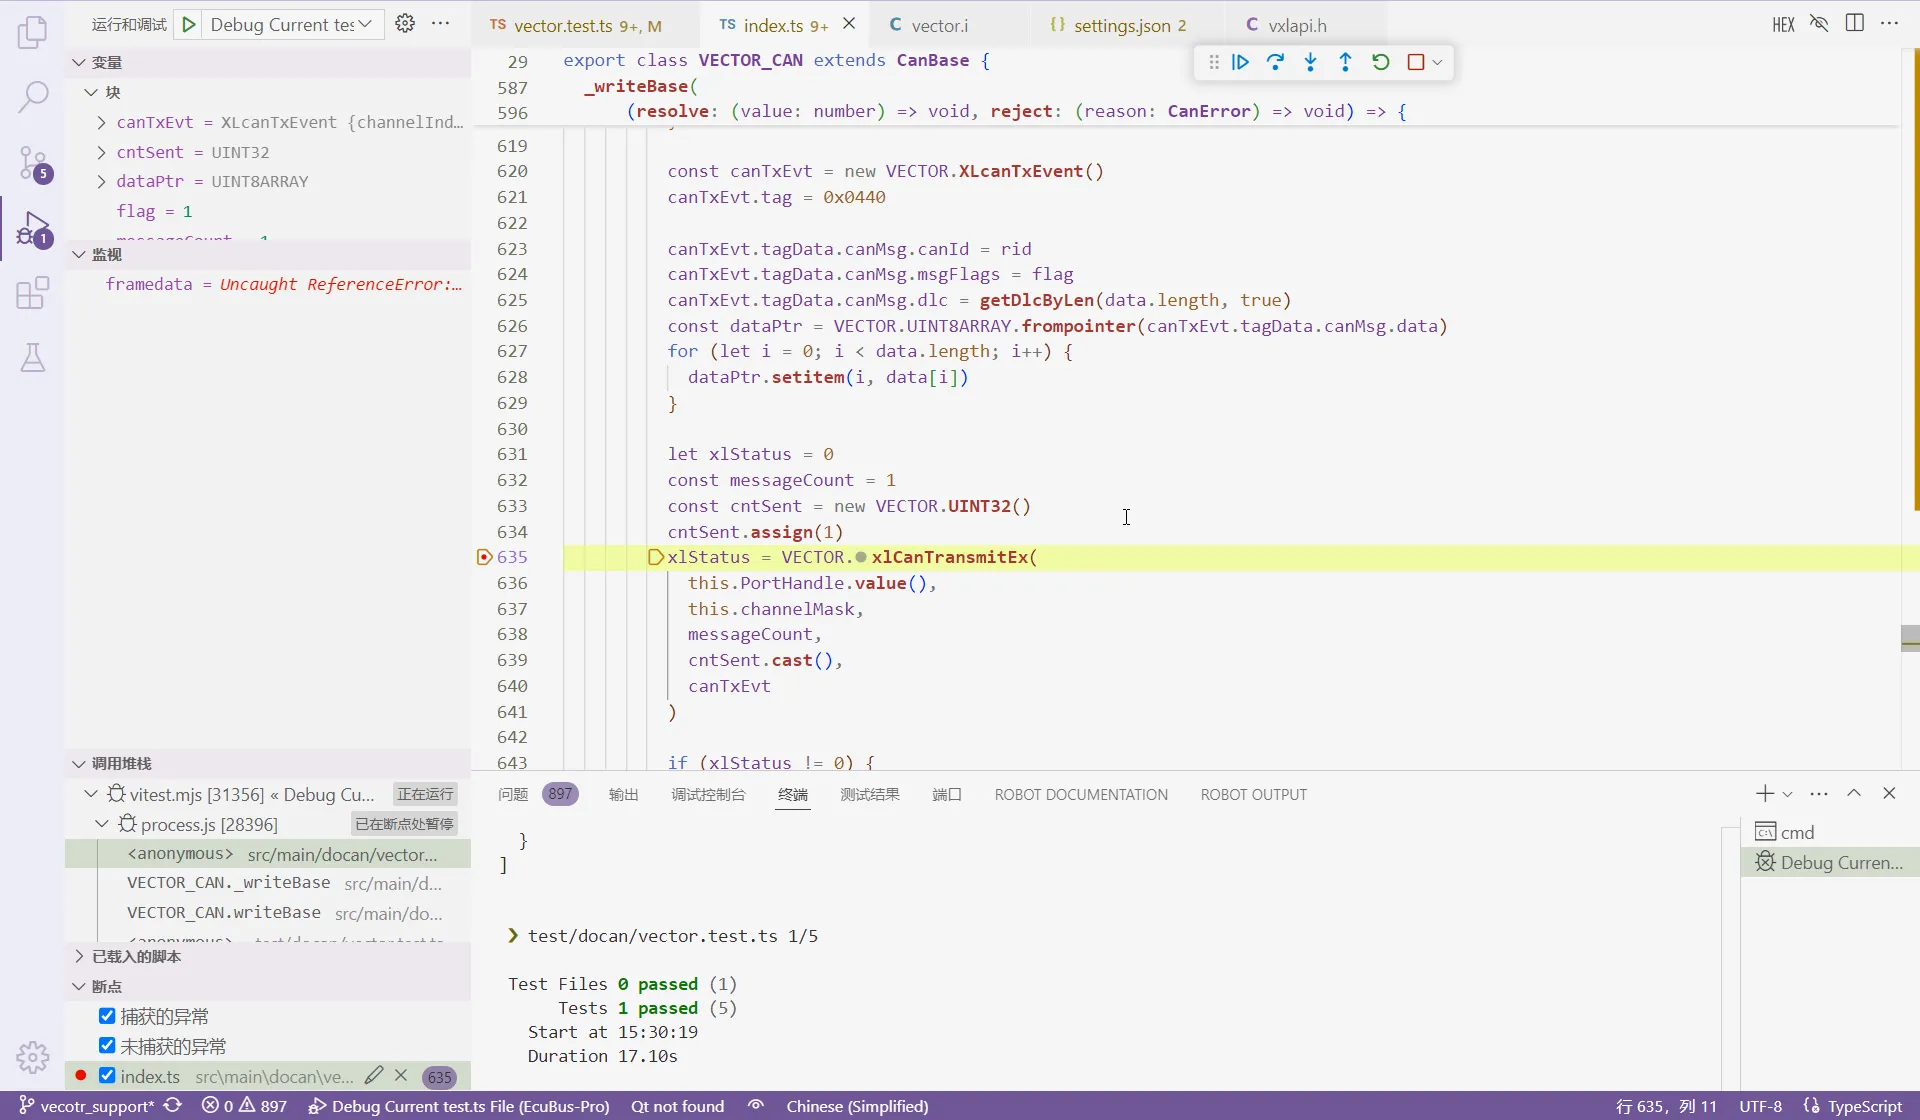
最后,tsfn.cxx 也有一些 API 实现,只需替换原始对应的功能实现。
许多 .Lib API 参数必须使用特定的数据类型,否则会出现错误。 TypeScript 没有如此丰富的基本类型,因此您需要在 vector.i 中重新封装 vxlapi.h 类型以供 .ts 使用。 以下是常见情况:
参数是指针类型,需要定义指针类:
vxlapi.h
    typedef XLlong XLportHandle;
vector.i
    %pointer_class(XLportHandle, XLPORTHANDLE)
    %pointer_class(unsigned int, UINT32)
    %pointer_class(unsigned short, UINT16)
index.ts
    private PortHandle = new VECTOR.XLPORTHANDLE()
    this.PortHandle.cast(),
    const cntSent = new VECTOR.UINT32()
    cntSent.assign(1)
    cntSent.cast()
参数是数组结构指针类型,需要定义数组类:
vxlapi.h
    typedef struct {
    ...
    XL_CAN_RX_EVENT_UNION tagData;
    } XLcanRxEvent;
vector.i
    %array_class(XLcanRxEvent, XLCANRXEVENT);
index.ts
    const frames = new VECTOR.XLCANRXEVENT(1)
    xlStatus = VECTOR.xlCanReceive(this.PortHandle.value(), frames.cast())
CAN 发送/接收接口参数有多种结构类型,需要定义数组类以访问:
vxlapi.h
    struct s_xl_can_msg {
    ...
    unsigned char  data[MAX_MSG_LEN];
    };

    union s_xl_tag_data {
    struct s_xl_can_msg                  msg;
    ...
    };

    struct s_xl_event {
    XLeventTag     tag;
    ...
    union s_xl_tag_data tagData;
    };

vector.i
    %array_class(unsigned char, UINT8ARRAY)

index.ts
    const framedata = new VECTOR.s_xl_event()
    framedata.tag = 10
    const dataPtr = VECTOR.UINT8ARRAY.frompointer(framedata.tagData.msg.data)
    for (let i = 0; i < data.length; i++) {
        dataPtr.setitem(i, data[i])
    }
vxlapi.h 中的某些结构具有需要提取的联合体:
typedef struct {
    ...
} XL_CAN_TX_MSG;

typedef struct {
  unsigned short     tag;              //  2 - 事件类型
  unsigned short     transId;          //  2
  unsigned char      channelIndex;     //  1 - 内部必须为0
  unsigned char      reserved[3];      //  3 - 必须为零

  union {
    XL_CAN_TX_MSG   canMsg;
  } tagData;
} XLcanTxEvent;
例如,成员 canMsg 需要重新定义为 XL_CAN_TX_MSG_UNION,否则 .ts 无法访问它:
typedef union {
  XL_CAN_TX_MSG   canMsg;
} XL_CAN_TX_MSG_UNION;


typedef struct {
  unsigned short     tag;              //  2 - 事件类型
  unsigned short     transId;          //  2
  unsigned char      channelIndex;     //  1 - 内部必须为0
  unsigned char      reserved[3];      //  3 - 必须为零

  XL_CAN_TX_MSG_UNION tagData;
} XLcanTxEvent;
每次修改 vxlapi.h 和 vector.i 后,都需要重新运行 s.bat 和 npx node-gyp rebuild 以重新生成 .node,确保其在 .ts 中生效。
vector.test.ts 测试通过后,参照在 UI 中添加添加到 UI,此处不再赘述。