UDS文件编程示例
本示例演示如何使用UDS(统一诊断服务)协议将十六进制文件和S-record文件编程到ECU中。 该项目展示了如何使用HexMemoryMap和S19MemoryMap解析Intel HEX和Motorola S-record文件,并使用块传输方式将其编程到ECU中。
概述
该示例使用以下UDS服务实现编程序列:
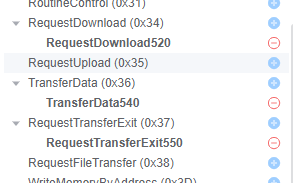
- RequestDownload (0x34)
- TransferData (0x36)
- RequestTransferExit (0x37)
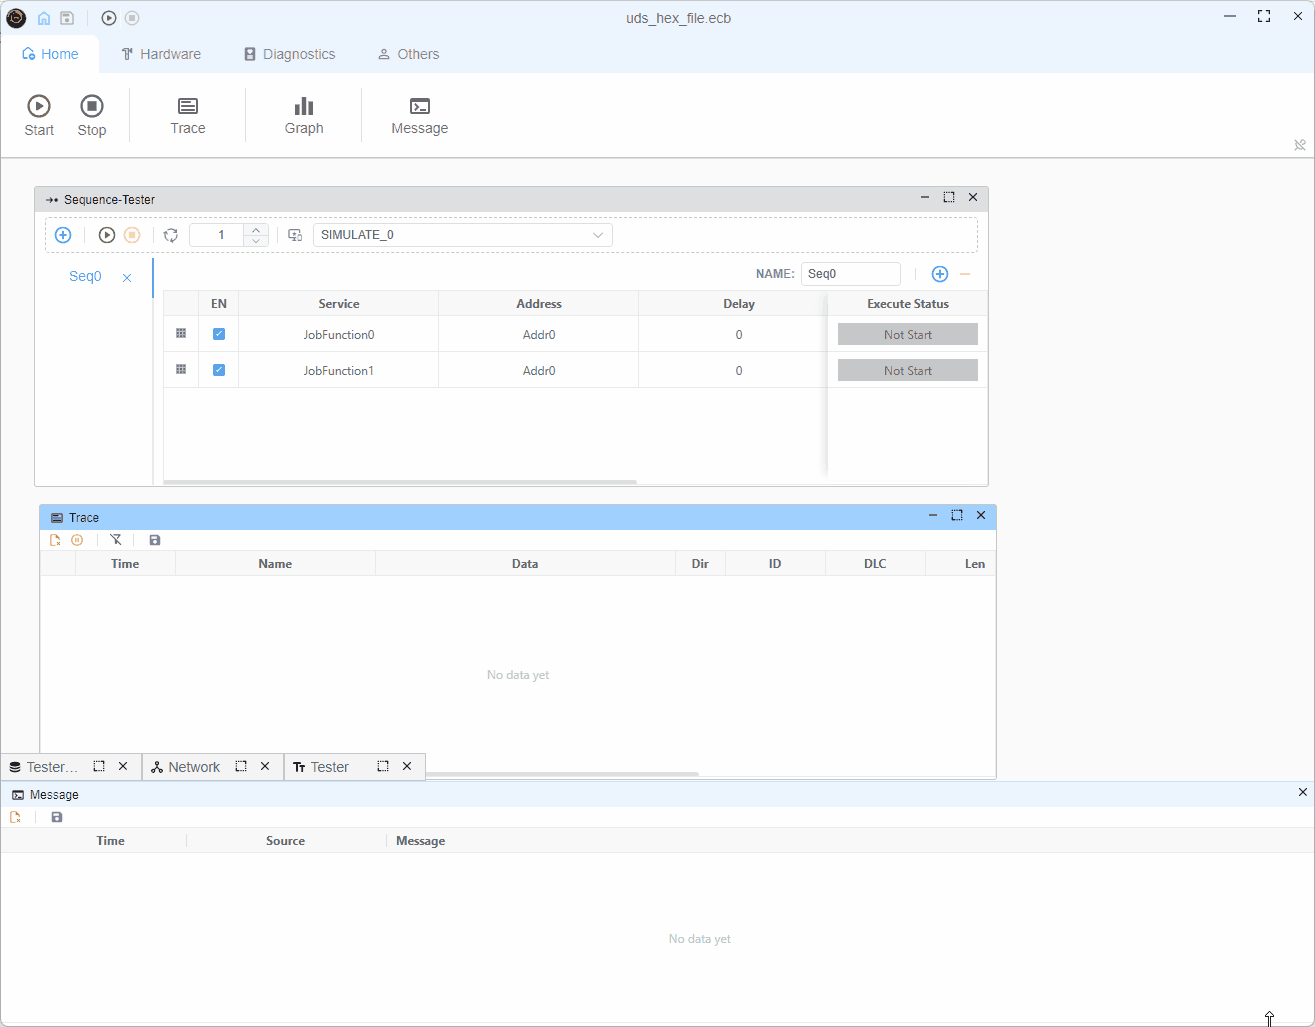
测试仪配置
测试仪 (tester.ts)

服务
- 0x34
- 0x36
- 0x37
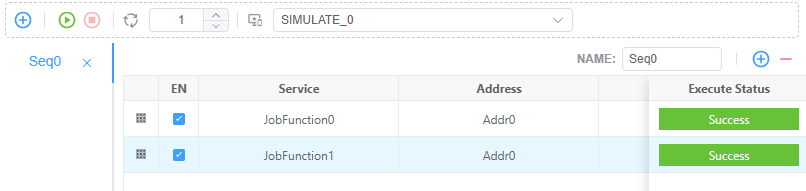
序列
tester.ts实现细节
文件格式支持
该项目使用HexMemoryMap和S19MemoryMap支持Intel HEX和Motorola S-record格式:
Intel HEX文件 (.hex)
typescript
const hexFile = path.join(process.env.PROJECT_ROOT, 'Hello_World.hex')
const hexStr = await fsP.readFile(hexFile, 'utf8')
const map = HexMemoryMap.fromHex(hexStr)
// Convert hex data into memory blocks
for (const [addr, data] of map) {
  pendingBlocks.push({ addr, data })
}
Motorola S-record文件 (.s19, .srec)
typescript
const s19File = path.join(process.env.PROJECT_ROOT, 'Hello_World.s19')
const s19Str = await fsP.readFile(s19File, 'utf8')
const map = S19MemoryMap.fromS19(s19Str)
// Convert S-record data into memory blocks
for (const [addr, data] of map) {
  pendingBlocks.push({ addr, data })
}
自动检测示例
typescript
const filePath = process.env.FIRMWARE_FILE // Could be .hex or .s19
const fileContent = await fsP.readFile(filePath, 'utf8')
const fileExt = path.extname(filePath).toLowerCase()

let map
if (fileExt === '.hex') {
  map = HexMemoryMap.fromHex(fileContent)
} else if (fileExt === '.s19' || fileExt === '.srec') {
  map = S19MemoryMap.fromS19(fileContent)
} else {
  throw new Error(`Unsupported file format: ${fileExt}`)
}

// Both formats use the same interface
for (const [addr, data] of map) {
  pendingBlocks.push({ addr, data })
}
支持的文件格式
| 格式 | 文件扩展名 | 记录类型 | 地址范围 |
|---|---|---|---|
| Intel HEX | .hex | :00-:05 | 16位带扩展 |
| Motorola S-record | .s19, .srec, .s28, .s37 | S0-S9 | 16位 (S1), 24位 (S2), 32位 (S3) |
HexMemoryMap和S19MemoryMap都提供相同的接口,使得在格式之间切换或在同一应用程序中支持两种格式变得容易。
更多详细信息可在API文档中找到:
编程流程
编程过程分为两个主要作业功能:
作业功能0(初始请求)
- 读取下一个要编程的内存块
- 发送RequestDownload (0x34)服务,包含内存地址和大小
- 从ECU响应中获取最大块大小
typescript
const r34 = DiagRequest.from('Tester.RequestDownload520')
const memoryAddress = Buffer.alloc(4)
memoryAddress.writeUInt32BE(currentBlock.addr)
r34.diagSetParameterRaw('memoryAddress', memoryAddress)
r34.diagSetParameter('memorySize', currentBlock.data.length)
作业功能1(数据传输)
- 根据maxChunkSize将数据分割成块
- 为每个块发送TransferData (0x36)
- 在所有块之后发送RequestTransferExit (0x37)
- 如果存在更多块,则重新启动过程
关键特性
多格式支持
- Intel HEX格式支持 (:00-:05记录)
- Motorola S-record格式支持(S0-S9记录,含S1/S2/S3数据)
- 两种格式的统一接口
- 基于文件扩展名的自动格式检测
动态块大小调整
- 根据ECU能力调整块大小
- 对齐到8字节边界以获得最佳传输效果
typescriptmaxChunkSize -= 2 // Account for block sequence counter if (maxChunkSize & 0x07) { maxChunkSize -= maxChunkSize & 0x07 }块序列计数器
- 实现1-255滚动计数器用于块跟踪
typescriptconst blockSequenceCounter = Buffer.alloc(1) blockSequenceCounter.writeUInt8((i + 1) & 0xff)自动块管理
- 队列多个内存块
- 自动处理块之间的转换
- 为每个块重新启动编程序列
- 与HEX和S-record格式无缝协作
流程图
mermaid
sequenceDiagram
participant Tester
participant ECU
Note over Tester: Job Function 0
Tester->>ECU: RequestDownload (0x34)
ECU-->>Tester: Positive Response + maxBlockSize
Note over Tester: Job Function 1
loop For each chunk
Tester->>ECU: TransferData (0x36) + BlockSequence
ECU-->>Tester: Positive Response
end
Tester->>ECU: RequestTransferExit (0x37)
ECU-->>Tester: Positive Response
alt More Blocks Exist
Note over Tester: Restart with Job Function 0 Job Function 1
else No More Blocks
Note over Tester: Programming Complete
end
ECU仿真
Node 1(ecu.ts)仿真,响应编程请求。 ECU端处理三个主要服务: 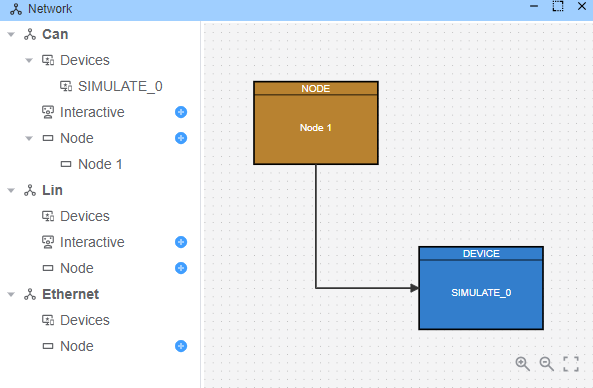
1. RequestDownload (0x34) 响应
typescript
Util.On('Tester.RequestDownload520.send', async (req) => {
  const resp = DiagResponse.fromDiagRequest(req)
  // Response: 0x74 (positive response)
  // 0x40: length format identifier
  // 0x00000081: maxNumberOfBlockLength (129 bytes)
  resp.diagSetRaw(Buffer.from([0x74, 0x40, 0, 0, 0, 0x81]))
  await resp.outputDiag()
})- 返回肯定响应 (0x74)
- 指定最大块长度(129字节)
- 使用长度格式标识符 0x40
2. TransferData (0x36) 响应
typescript
Util.On('Tester.TransferData540.send', async (req) => {
  const resp = DiagResponse.fromDiagRequest(req)
  // Response: 0x76 (positive response) + block sequence counter
  resp.diagSetRaw(Buffer.from([0x76, Number(req.diagGetParameter('blockSequenceCounter'))]))
  await resp.outputDiag()
})- 使用肯定响应 (0x76) 确认每个数据块
- 回显块序列计数器
- 模拟成功的数据传输
3. RequestTransferExit (0x37) 响应
typescript
Util.On('Tester.RequestTransferExit550.send', async (req) => {
  const resp = DiagResponse.fromDiagRequest(req)
  // Response: 0x77 (positive response)
  resp.diagSetRaw(Buffer.from([0x77]))
  await resp.outputDiag()
})- 使用肯定响应 (0x77) 确认传输完成
- 模拟成功的编程完成
ECU仿真为编程序列提供了完整的测试环境,允许开发人员无需实际硬件即可测试其编程实现。 无论源文件是Intel HEX格式还是Motorola S-record格式,仿真工作方式完全相同。
演示