Monitor variable changes, send a LIN signal, and manually set an incorrect checksum
Thanks to Alex for providing the example
CAPL Analysis
The provided CAPL example is as follows:
on envVar EnvChecksumError
{
  if (1 == getValue(EnvChecksumError))  // Checksum err
  {
     write("Checksum err");
    linSetManualChecksum(frmAC_1, linGetChecksum(frmAC_1) - 1);
    //linSetManualChecksum(frmReq, linGetChecksum(frmReq) - 1);

    //output(frmReq);
    output(frmAC_1);
  }
}
CAPL Code Walkthrough
The core logic of this CAPL script is:
- Environment variable listen:
on envVar EnvChecksumErrorlistens for changes to theEnvChecksumErrorenvironment variable - Condition check: When the variable value is 1, trigger error injection logic
- Error injection:
linGetChecksum(frmAC_1)obtains the correct checksum valuelinSetManualChecksum(frmAC_1, checksum - 1)manually sets an incorrect checksum (minus 1)output(frmAC_1)sends a LIN message with an incorrect checksum
NOTE
- Technical note: The LIN bus checksum mechanism is critical for ensuring data integrity. By deliberately setting an incorrect checksum, you can test the error handling capability of the receiving node.
- Test equipment: We choose LinCable as the testing device because it can flexibly inject various LIN errors.
Variable Configuration in EcuBus-Pro
Step 1: Create an environment variable
To implement variable watching, first create the corresponding environment variable in EcuBus-Pro. Environment variables are an important bridge between scripts and the user interface.
Path: Others → Variable → Add Variable

Key variable settings
- Name:
EnvChecksumError(must match the variable name in the CAPL script) - Type: Integer
- Initial value: 0 (normal state)
- Range: 0–1 (0 = normal, 1 = trigger error)
Step 2: Verify the variable
After creation, you can view and manage the variable in the variable list:

In the variable list, you can:
- View the current value of the variable
- Modify the variable configuration
- Delete unnecessary variables
- Export/Import variable configurations
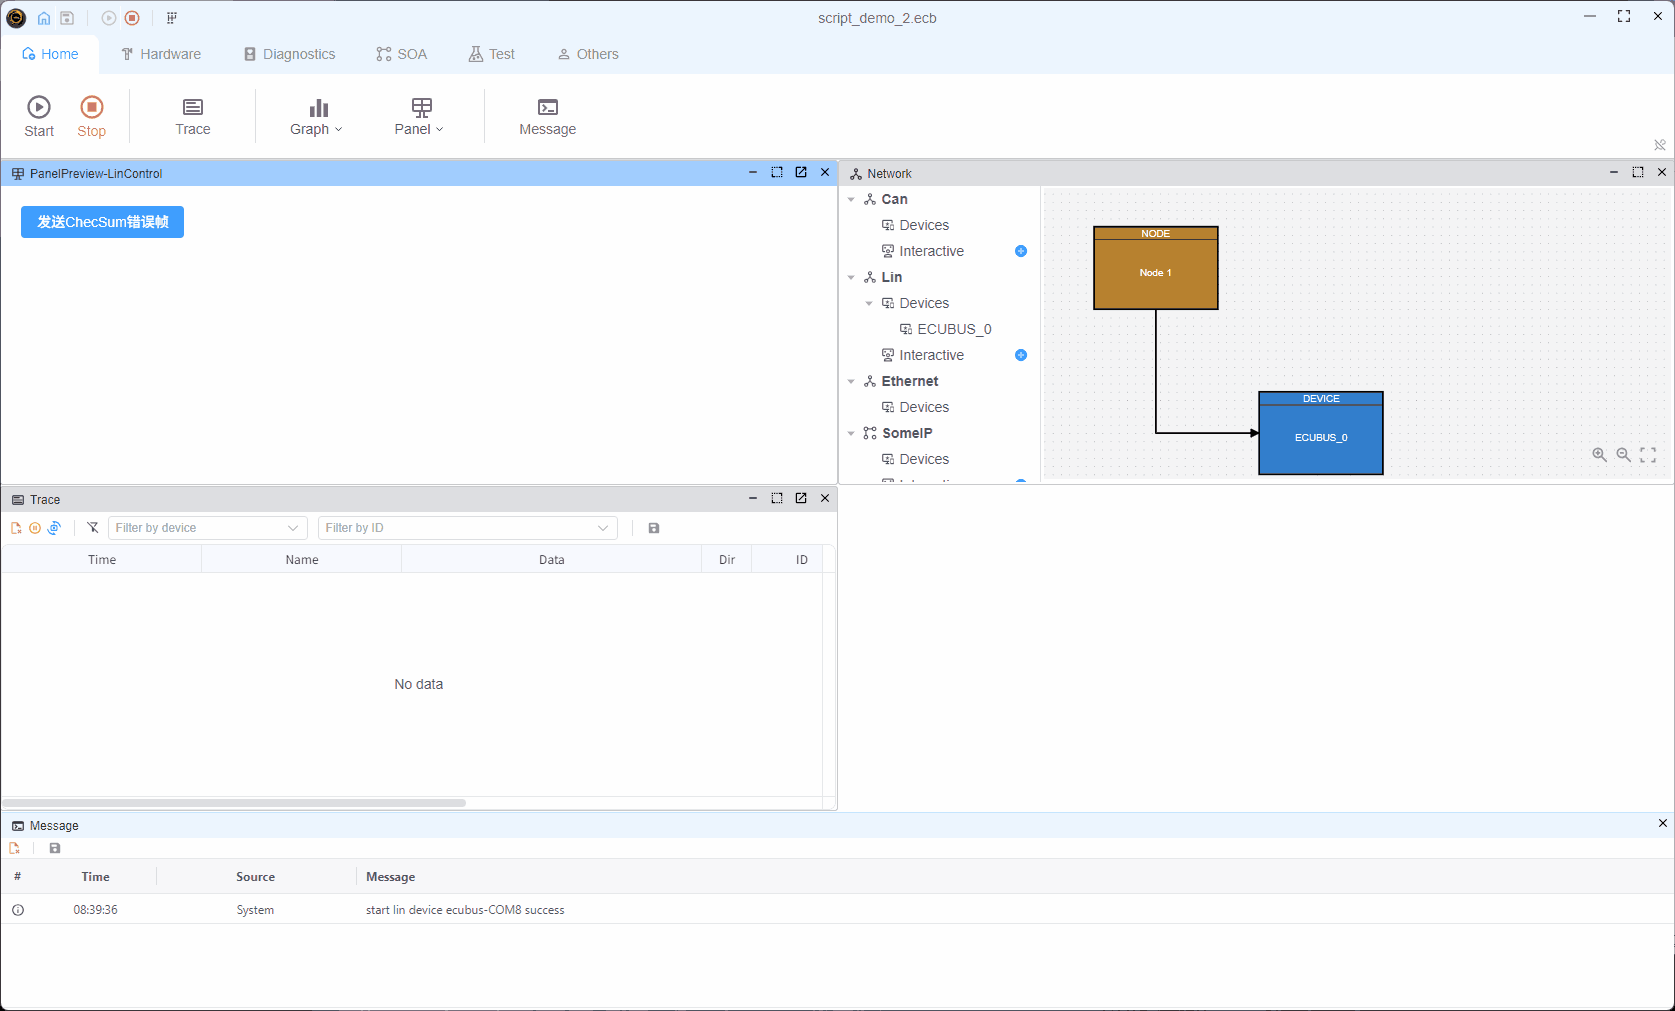
UI Control Panel Configuration
Step 3: Create the control panel
To dynamically control the variable value during testing, create a user interface panel. Through the graphical interface, testers can switch the variable state in real time without modifying code.
Path: Home → Panel → Add Panel
Panel design recommendations
- Use a switch or toggle control to represent the 0/1 state
- Set descriptive button text such as "Send checksum error frame"
- Lay out the controls clearly to ensure intuitive operation
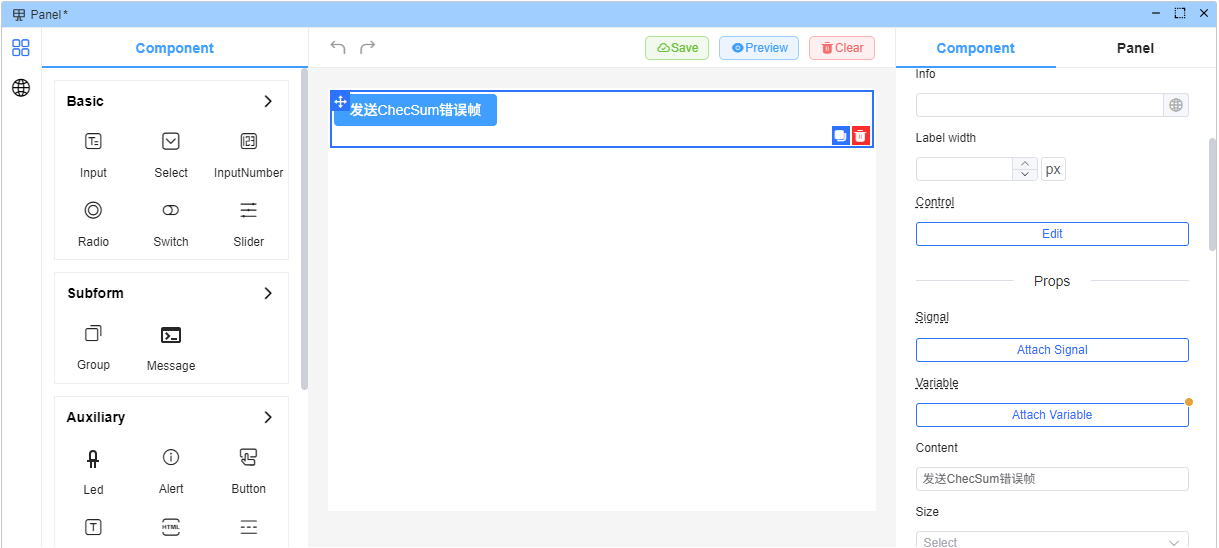
Step 4: Bind the variable
After creating the panel control, bind it to the environment variable to establish a two-way data association between the control and the variable.
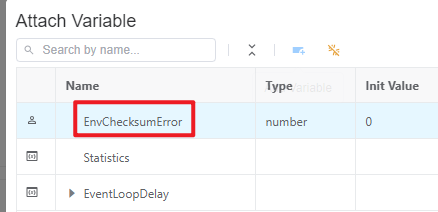
Binding settings
- Target variable: Select the previously created
EnvChecksumErrorvariable - Control type: Boolean Switch
- Mapping: OFF = 0 (normal), ON = 1 (trigger error)
Step 5: Preview the UI
After configuration, you can preview the final user interface:
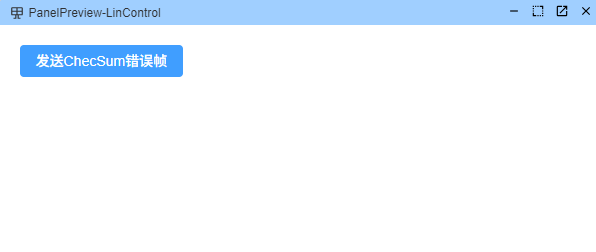
UI highlights
- Display the current variable state in real time
- Support one-click toggle operations
- Provide intuitive visual feedback
EcuBus-Pro TypeScript Implementation
Step 6: Write the TypeScript script
Now we convert the CAPL logic into an EcuBus-Pro TypeScript script. Compared with CAPL, TypeScript provides better type safety and a better development experience.
Util.OnVar("EnvChecksumError", ({ value }) => {
    if (value == 1) {
        console.log("Checksum err");
        const msg: LinMsg =
        {
            frameId: 0x3c,
            direction: LinDirection.SEND,
            data: Buffer.from([0x60, 0x01, 0xb5, 0xff, 0xff, 0xff, 0xff, 0xff]),
            checksumType: LinChecksumType.CLASSIC,
            lincable:{
                checkSum:3,// wrong checksum
            }
        }
        output(msg);
    }
});
Detailed Script Walkthrough
1. Variable watch mechanism
Util.OnVar("EnvChecksumError", ({ value }) => {
    // Callback, triggered when the variable value changes
});Util.OnVar()is the variable watch API provided by EcuBus-Pro- Destructuring assignment is supported to directly obtain the
valueparameter - The callback is automatically triggered when the variable value changes
2. LIN message construction
const msg: LinMsg = {
    frameId: 0x3c,              // LIN frame ID (hex)
    direction: LinDirection.SEND, // Send direction
    data: Buffer.from([...]),    // Data byte array
    checksumType: LinChecksumType.CLASSIC, // Checksum type
    lincable: {
        checkSum: 3             // Manually set incorrect checksum
    }
}
3. Key parameter descriptions
| Parameter | Description | Example |
|---|---|---|
frameId | LIN frame identifier | 0x3c (60) |
direction | Message direction | LinDirection.SEND |
data | Data payload | 8-byte data array |
checksumType | Checksum type | CLASSIC or ENHANCED |
checkSum | Manual checksum | 3 (intentionally incorrect) |
4. Error injection principle
Under normal circumstances, the checksum of a LIN message should be calculated automatically based on the data content. In testing scenarios, we manually specify an incorrect value (e.g., 3) via lincable.checkSum to simulate a transmission error and test the receiving node’s error-handling capability.
Test Run and Verification
Step 7: Run the test
After completing all configurations, run the test. Use the toggle button on the UI to control the variable value and observe the sending of LIN messages.